Your store page is a digital welcome mat for customers. It is your chance to connect with potential buyers, demonstrate your expertise and passion for products that you sell.
If you’re new to selling online, it can feel confusing to figure out how to create a top-notch online store. This article contains step-by-step instructions as well as best practice recommendations.
Get your Well Resourced Dietitian store optimized and ready to start earning.
What is a store page?
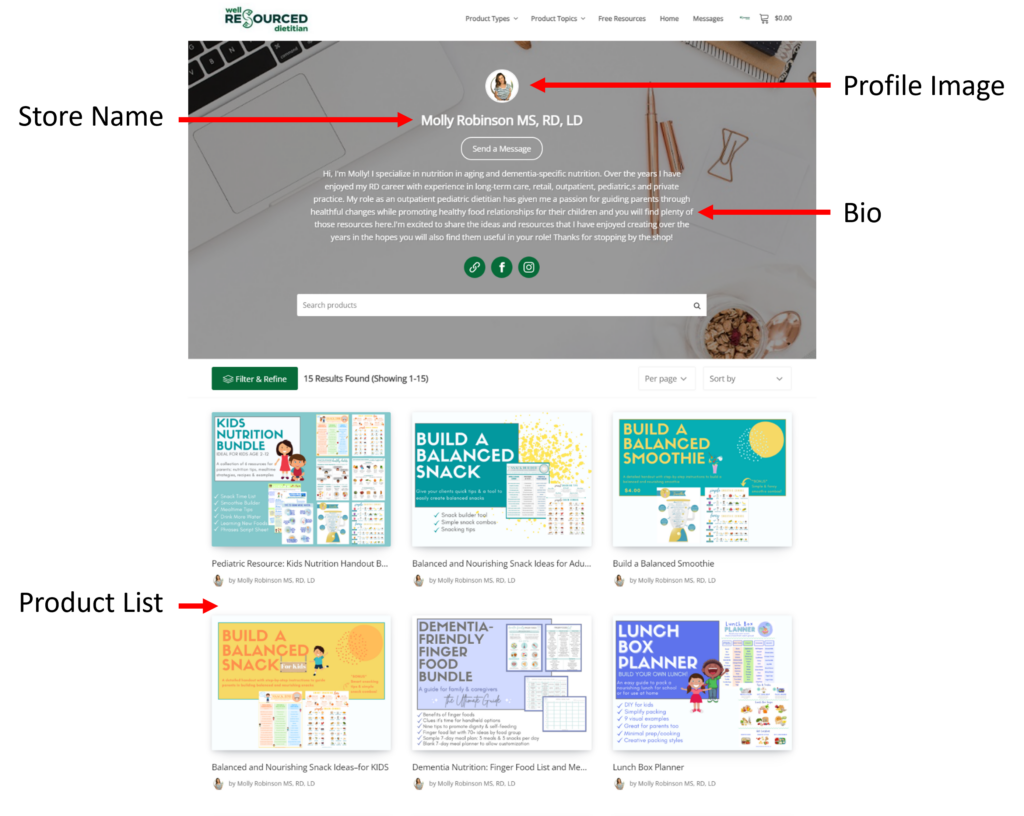
Your store on Well Resourced Dietitian is a specific page/URL showing all your products. In addition to a complete product list, it features an image, bio, link to your website, and email contact form. Think of it as a digital storefront.
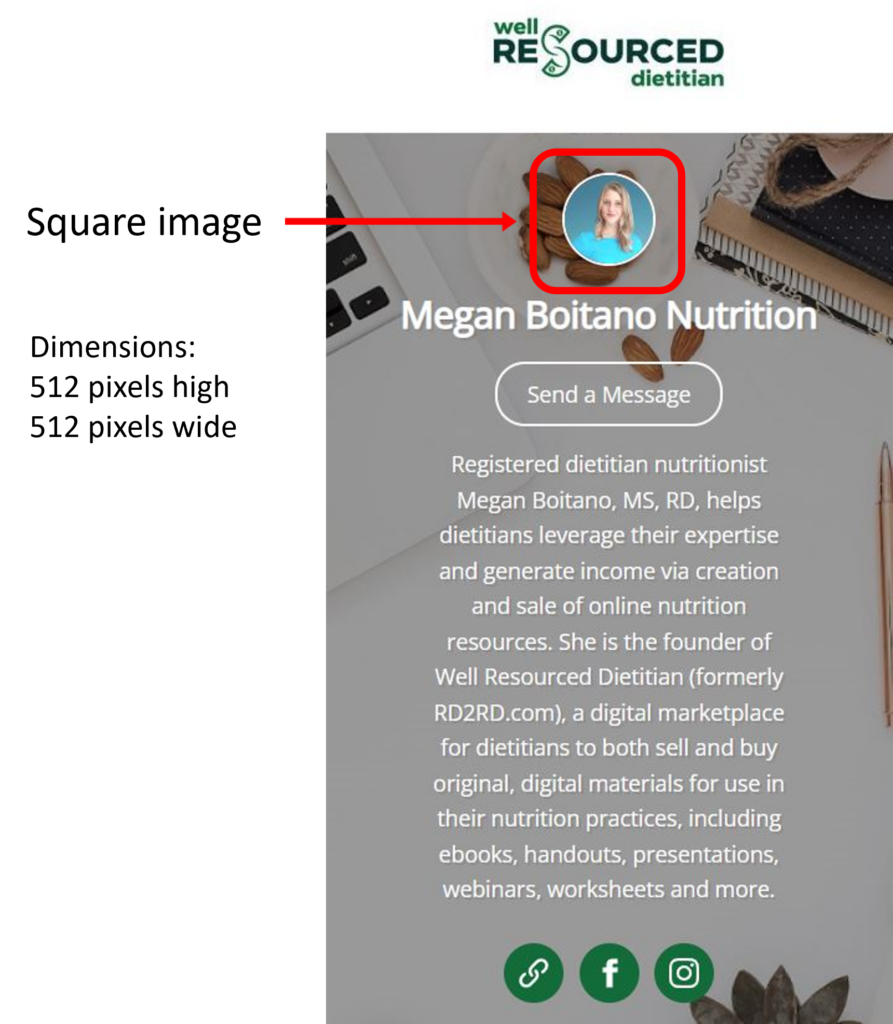
In the image below you can see the anatomy of a store page.
Here are a few examples of vendors with top notch store pages.
Eating Disorder Resourced (edrdbb)
Why customize your store page?
When shopping online, customers research products and sellers before purchasing.
Connect with customers
Well Resourced Dietitian makes it easy for customers to learn more about sellers. A detailed vendor profile is shown to customers. Reading about vendors helps customers decide which seller to purchase from.
At the bottom of each listing is customer are shown your vendor profile image, bio and a link to view all your product listings. This “view all downloads” link takes customers to your store page.
From your store page, customers can also use the vendor contact form to email you with questions about existing products. In some cases they may also request new products that you haven’t yet created.
By taking the time to update your profile with an image and biography, you will provide customers with information to help sell your products.
Generate more sales
Your store page is your digital storefront. While customers can visit Well Resourced Dietitian, search and find resources from multiple sellers, your store page features only your products.
You can easily link directly to your store page from your website, social media or in emails. This is an excellent way to market your products. The next time you see a “does anyone have a handout on ___?” you can quickly share a link to your store.
What does a completed vendor profile look like?
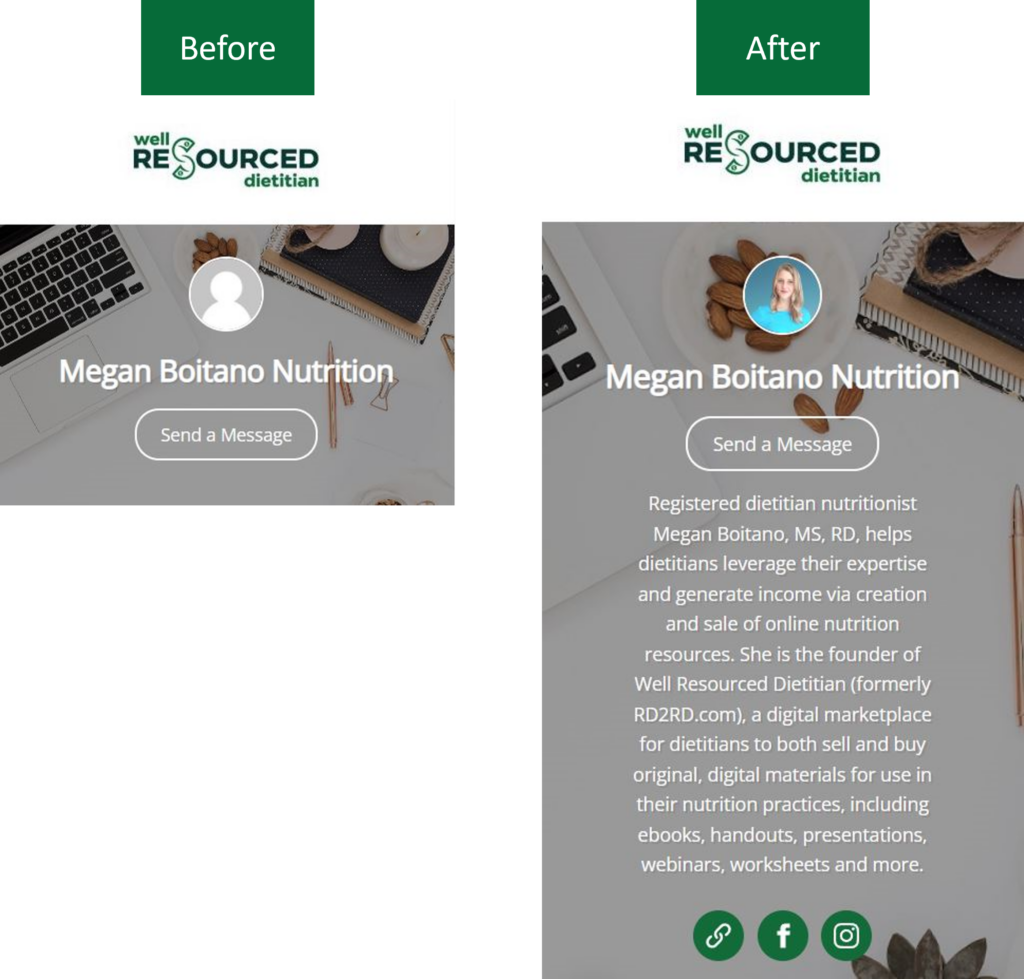
Below is an example of what potential customers are shown before and after updating your vendor profile.
Your profile includes your store name, image (picture or logo), a bio and a link to your website (if you have one).
Note that without a completed vendor profile, the area appears blank. This leaves potential customers without needed information to purchase your products and will decrease your sales.
Tips for choosing a profile image
Choose a high-quality photo or your brand logo. Don’t be afraid to use an image that includes some personality. Think about consistency across other platforms. You can use the same image for your Well Resourced Dietitian store page that you use on social media.
If you’re looking for inspiration, browse a few other Well Resourced stores or sites like Etsy. You’ll find many great examples.
Tips for writing your store bio
Your store bio should be engaging for potential customers to read. Think about how you can establish credibility surrounding your store niche and convey how your products help others. Avoid an overly formal bio that focuses on your educational and work experience.
Keep it brief and make sure it has attention grabbing elements to win and keep the attention of customers.
If you’re looking for a little help getting started, try this structure.
Hello, I’m _____. I create tools and resources to help _____. My background and passion developed from _____. What stands out about my products is ____. Thanks for checking out my store.
How to Find Your Store Page
There are 2 easy ways to obtain the link to your store page.
From the vendor dashboard
Login to the vendor dashboard with your username (email) and password. Navigate to the profile tab.
At the top of the profile area, you will see your store URL listed. Copy and paste this link to share your store with others.
Your store page will be: https://wellresourced.com/vendor/{your username}
To preview your store page, click the link and it will open in a browser window.

From a product listing
From the Well Resourced Dietitian homepage, use the search bar or category buttons to navigate to one of your product listings. Scroll to the bottom of the listing and click the link to view all downloads below your image and bio.
When viewing any product, click the link to view all downloads by the vendor. The store page is shown with a complete listing of products as well as detailed bio, link to website and profile image.

How to Customize Your Store Page
The vendor dashboard is your hub for all store management tasks. Follow these step-by-step instructions to personalize your store page with a bio and profile image.
Step 1: Login to your vendor dashboard
Step 2: Click “Profile” from the left-hand navigation

In the profile section, you can update important information associated with your vendor account. Your store bio and profile image are two key elements to add after registering as a vendor. Use the profile section to change your store name and add your website address if you have one.

Follow the step-by-step instructions below to create a profile image that is optimally sized and add your store bio.
Create a Correctly Sized Profile Image
This must be a square image no larger than 512 pixels high by 512 pixels wide. An image that is incorrectly sized will appear distorted or blurry. Give your store and products a professional appearance by having a high-quality profile image.
One of the most common mistakes vendors make it using an image that isn’t sized correctly. This is especially common when a logo is chosen. Only a small portion of logo is shown. If you want to use your logo for store image, follow this step-by-step guide using your logo instead of a picture.
You don’t need to be a graphic designer or have expensive software to create appealing and correctly sized images. Canva® is a free design program you can use to create graphics using a photo, existing logo or design your own from scratch using their intuitive, drag and drop interface.
Create an image for your store even if you are planning a new logo or professional photos. You can update your profile image at any time.
How to Create Your Profile Image Using Canva® (free version)
Login to Canva (create an account, if needed)
Step 1: Visit Canva website
Step 2: Login or create a new account with your email address
Create a Canvas with Custom Dimensions
Step 1: From you Canva account home screen, click “Custom Dimensions in the upper right.
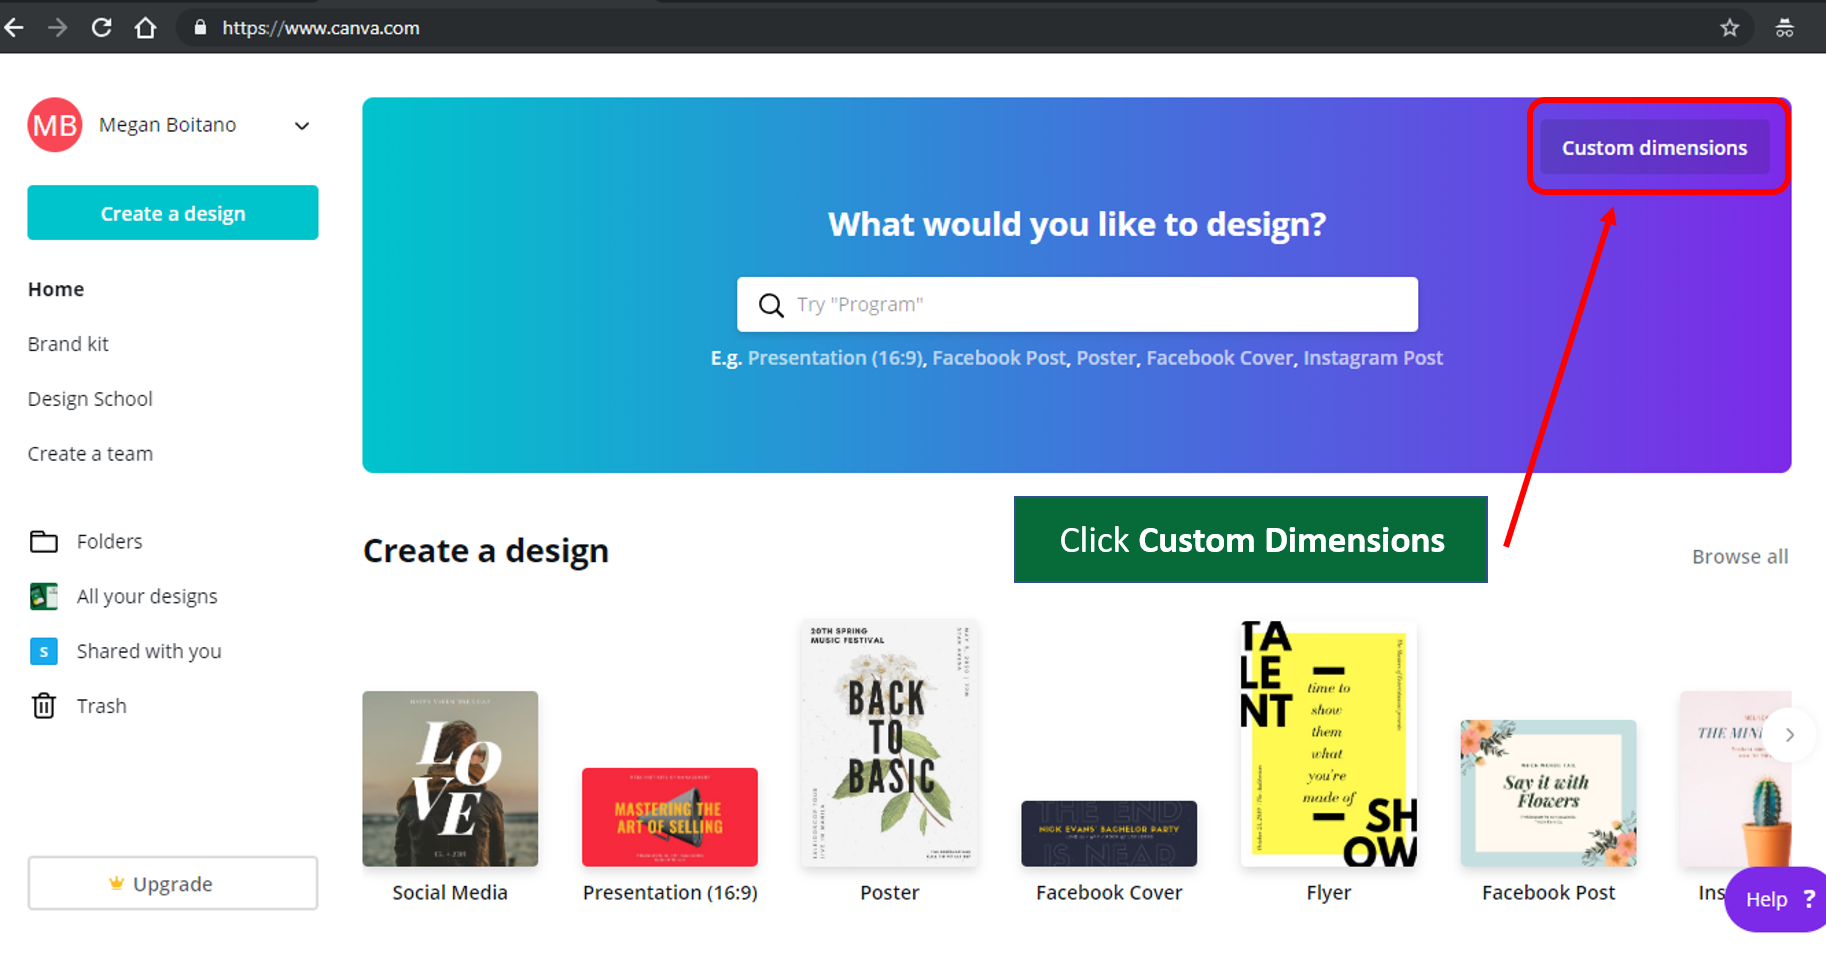
Step 2: Choose “px” as the measurement (not inches) and enter 512 in both height and width boxes. Click “Create New Design” when finished.

Your custom sized canvas will be shown and ready for design.
![]()
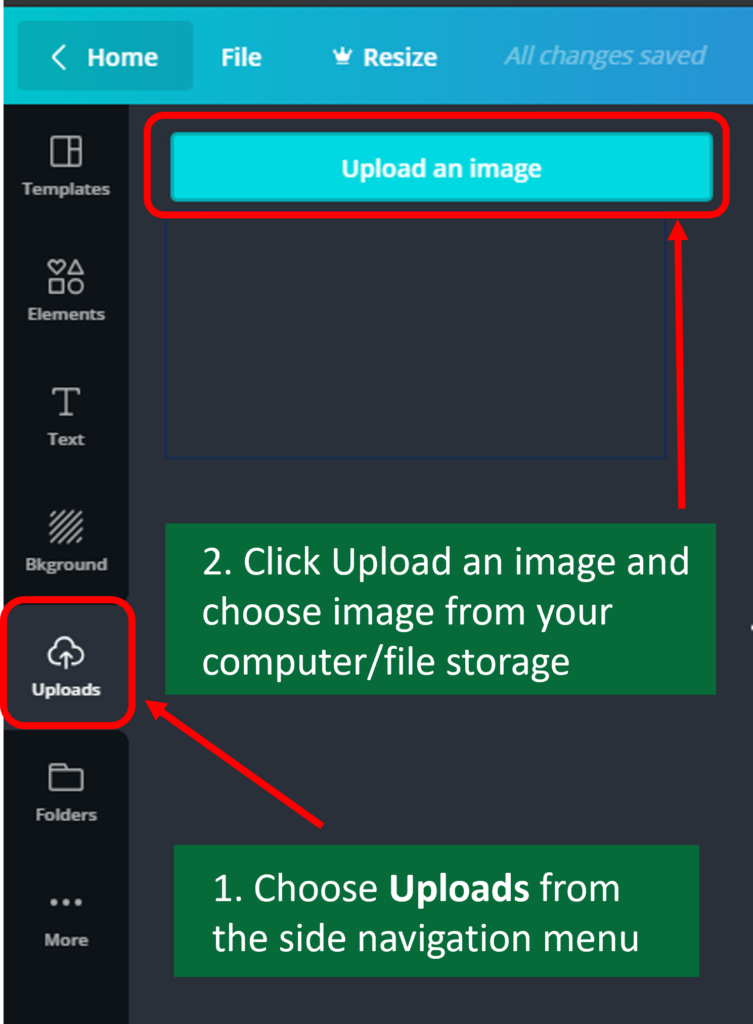
Add Your Picture or Logo
Step 1: Click “Uploads” from the side navigation
Step 2: Click “Upload an image” button and choose image file from your files.
Step 3: If the upload is successful, your image will display in the uploads area

Add Image and Adjust Size
Step 1: Click and drag your uploaded image to the canvas. Position the image so that it “snaps” and covers the entire canvas.

Step 2: Click the image to access image adjustment tools

Step 3: Click “Crop” to resize the image
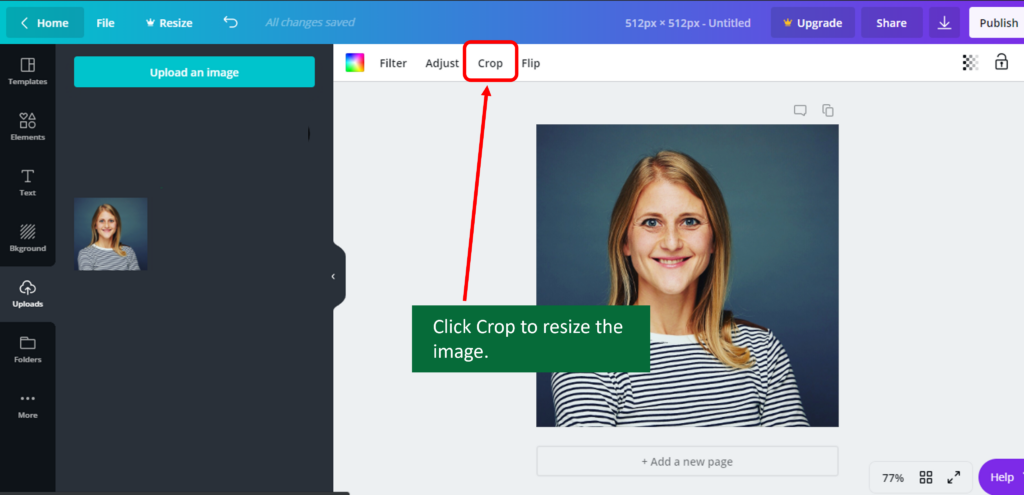
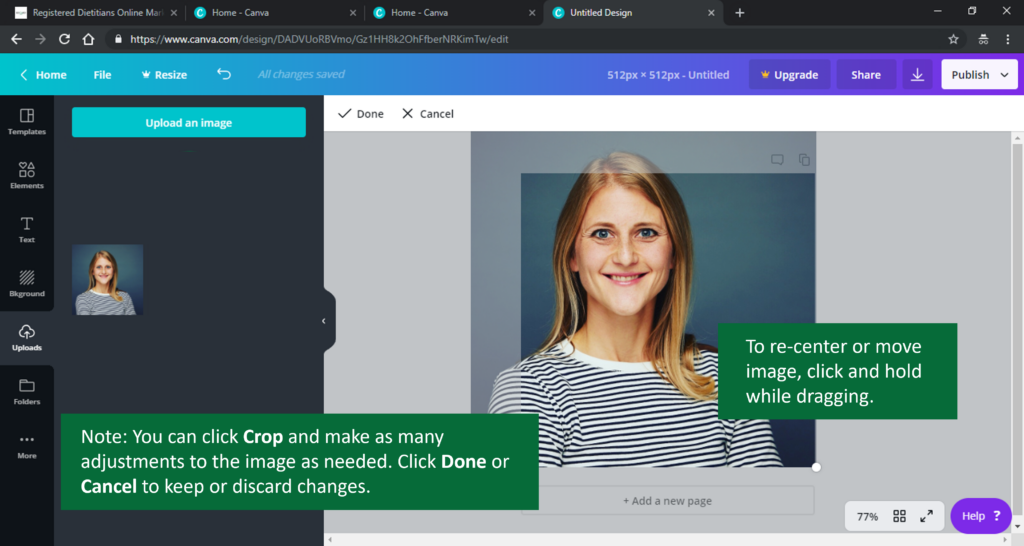
Step 4: Click and drag corner to adjust size. Click done to save changes.

Step 5: Re-position your image by clicking and dragging. Position and then release.
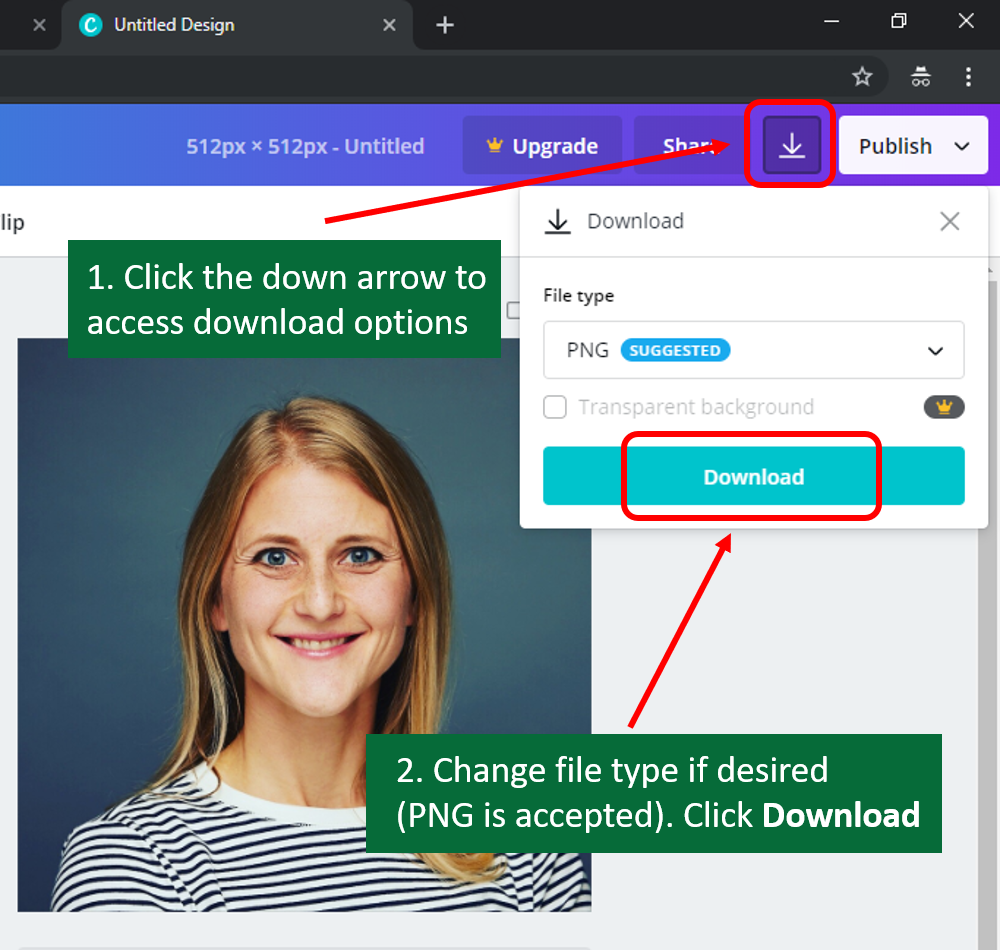
Download Completed Design
Step 1: Click the “Download” menu in the upper right
Step 2: Change the file type (PNG is accepted) and click “Download” button
Update Profile Image in Vendor Dashboard
Congratulations on creating a profile image for your store page. Now you can update your profile in your Vendor Dashboard with this image.
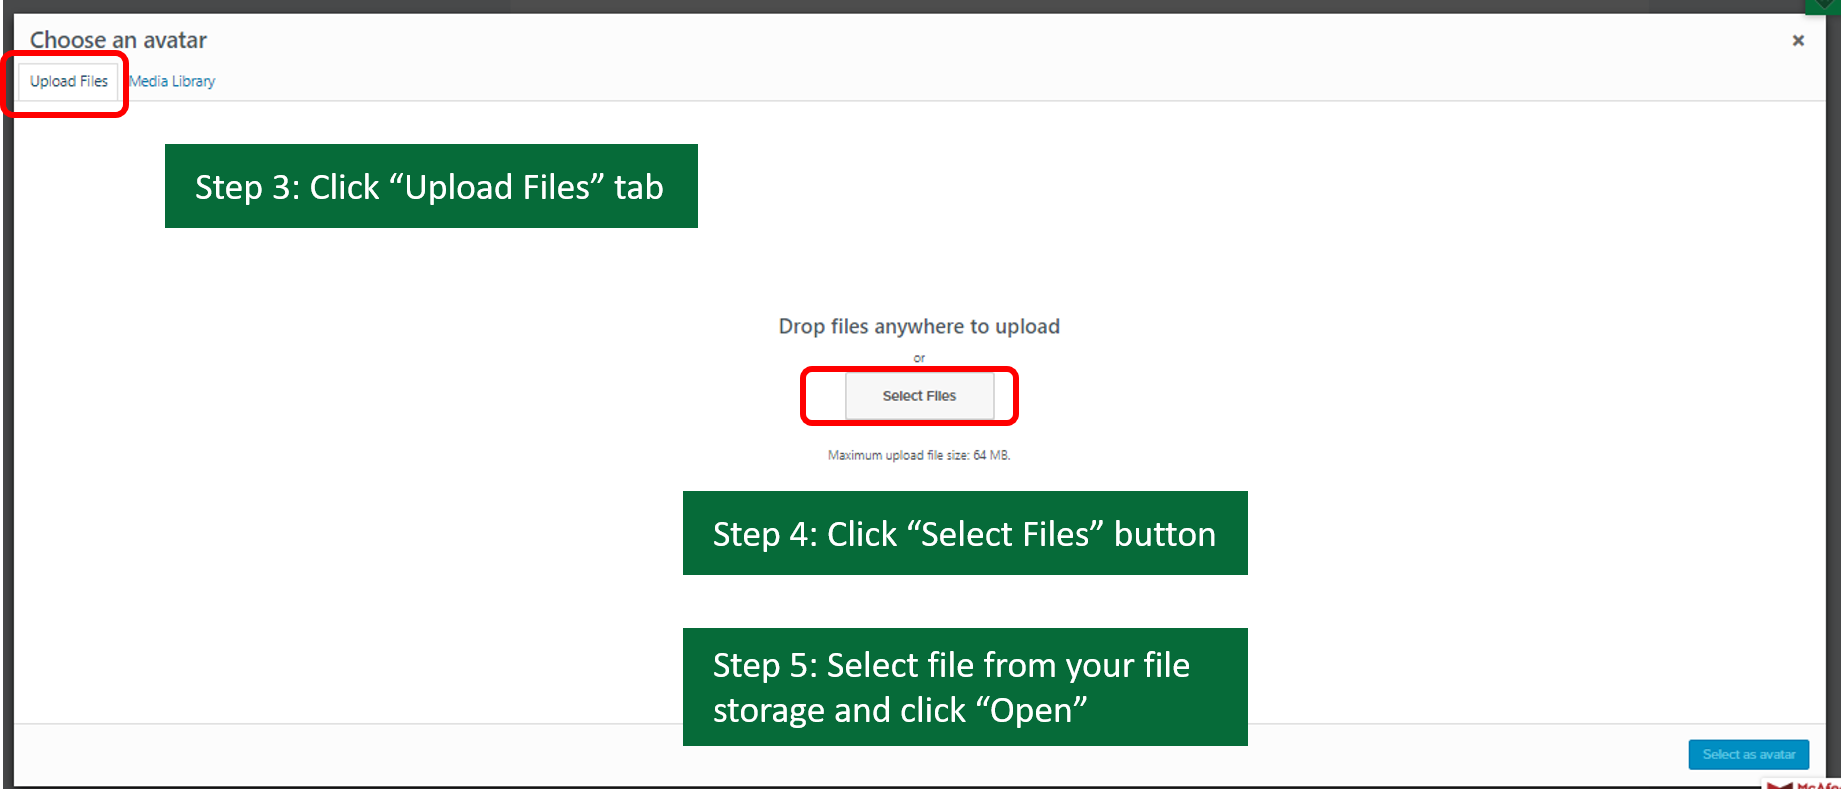
Upload Profile Image
Step 1: Click “Profile” from the Vendor Dashboard
Step 2: Scroll down to “Profile Picture” section and click “Upload Avatar”
![]()
Step 3: Click “Upload Files” tab
Step 4: Click “Select Files” button (you can also drag and drop file)
Step 5: Select file from your file storage (look in Downloads) and click “Open.”
Step 6: From the media library tab, click file to select. Note check mark appears.
Step 7: Click “Set as avatar” button
![]()
Step 8: Note your new profile image. Scroll to bottom of page and click “Save Changes.”
![]()
Congratulations! You have successfully updated your Well Resourced Dietitian store with a profile image. Now on to adding your bio.
Update Bio (About) in Vendor Profile
The information you include in the “About” section of your vendor profile is displayed on your product pages as well as your store page. Don’t overlook adding a strong bio to help boost customer confidence and sales.
Step 1: Click “Profile” from the Vendor Dashboard
Step 2: Scroll down to “About” section and type your bio. You can also copy/paste text.
Step 3: Scroll to bottom of page and press “Save.”
Preview Your Completed Store Page
Now that your store has a profile image and bio, it’s time to check out your work. View your store page as it will be viewed by customers. Visit your store page URL. Remember, you can obtain your store URL from the vendor dashboard homepage just under the welcome message.
Your store page will be: https://wellresourced.com/vendor/{your username}
Share your store page on social media, with colleagues and clients or add a link on your website.
Summary
Updating your vendor profile creates a vendor store page customized with an image and bio that reflects your unique personality and brand.
Your vendor profile serves a tool for customers to learn more about you, drive interest in your products and create confidence about your expertise.
Keep your profile up-to-date to be sure that it reflects your store contents. You can visit the vendor dashboard anytime to make changes.
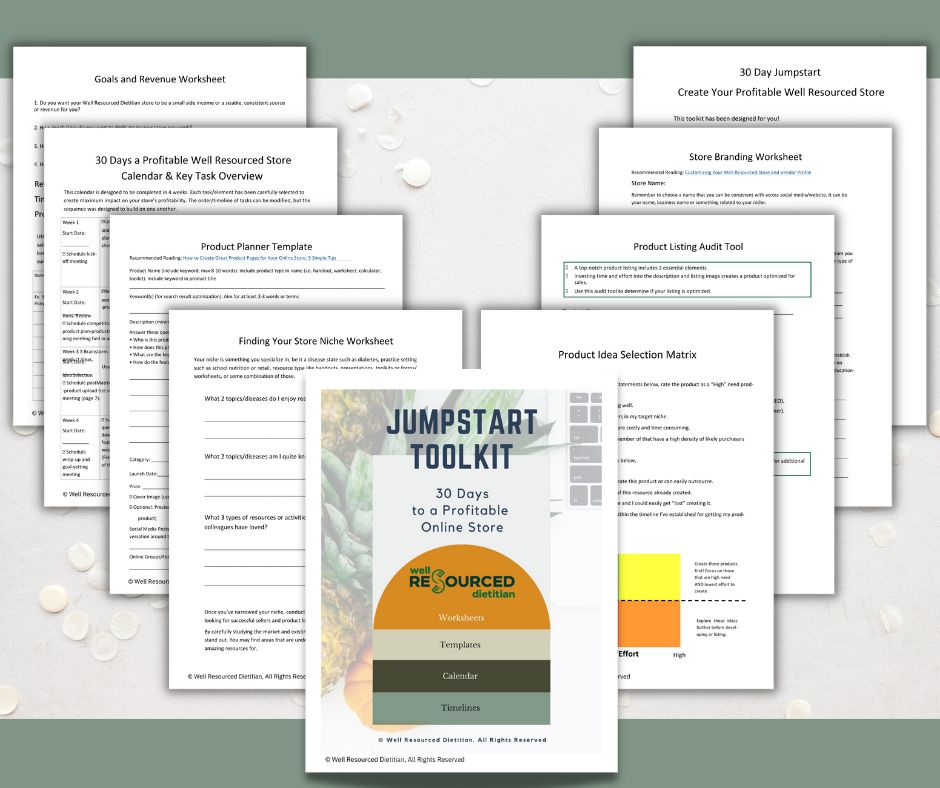
Next Steps
Grab the Jumpstart Toolkit and you’ll receive a Store Branding Worksheet. Use this 8 page resource with calendar, task lists, worksheets and templates to launch your profitable store quickly. Enter your information below to receive your copy!